In this tutorial, you’ll learn how to access your MyCoachSolutions subscriber portal, log onto your new website, and begin making changes.
When you set up your new website, you chose a url (website address / domain) that you’ll use until you’re ready to connect a permanent domain. It should look something like this -> awesomecoach.tempurl.host
If you remember your site’s address, you can type the address in your browser’s address bar and add /my-coach-login to sign in and access your site’s admin area. So, it would look like this -> awesomecoach.tempurl.host/my-coach-login
If you’re able to do that, then you can skip to step 4 of this tutorial. If not, you can start with step 1 below.
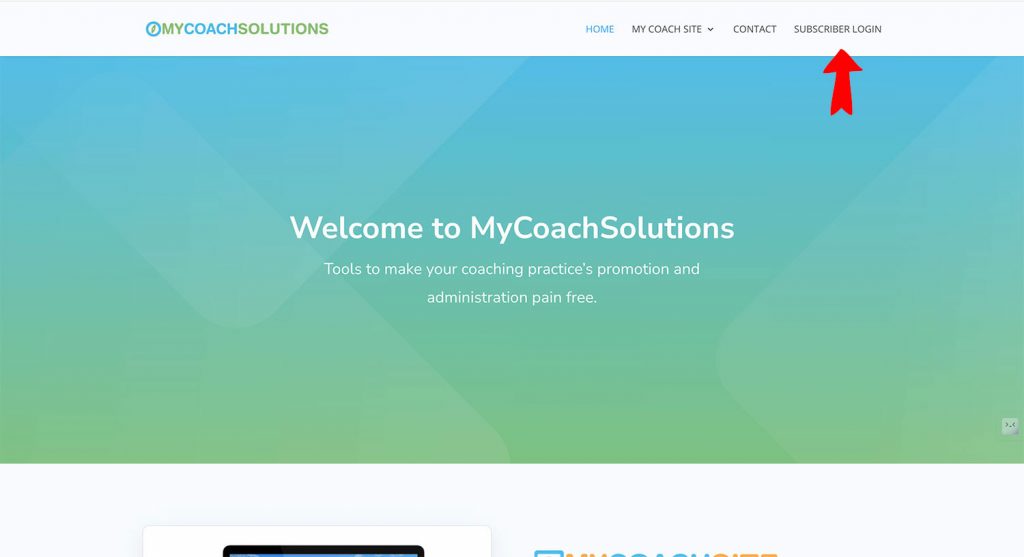
Step 1
Go to mycoachsolutions.com and click the subscriber login link at the top right of the page.
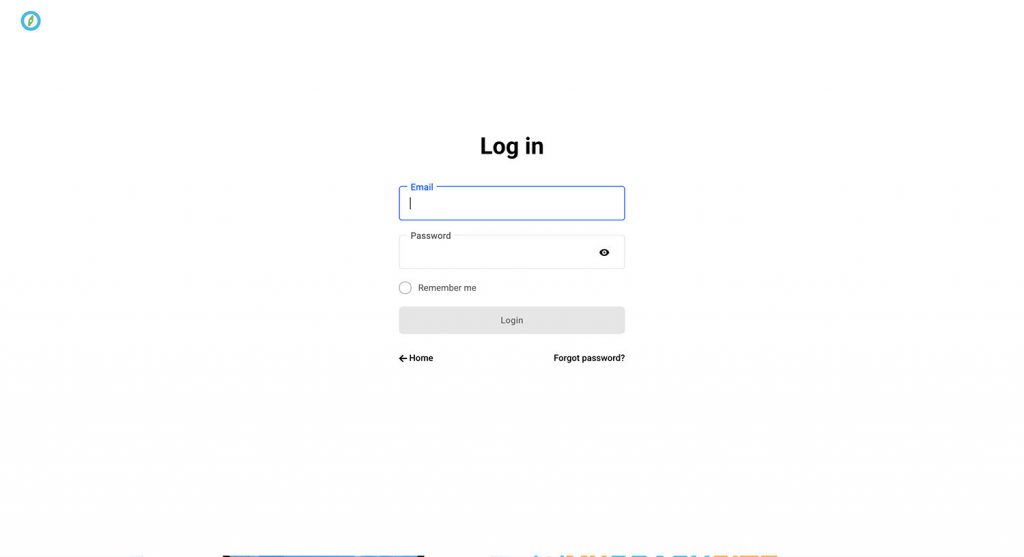
Step 2
Log into your MyCoachSolutions account using the email and password you chose when signing up.
Step 3
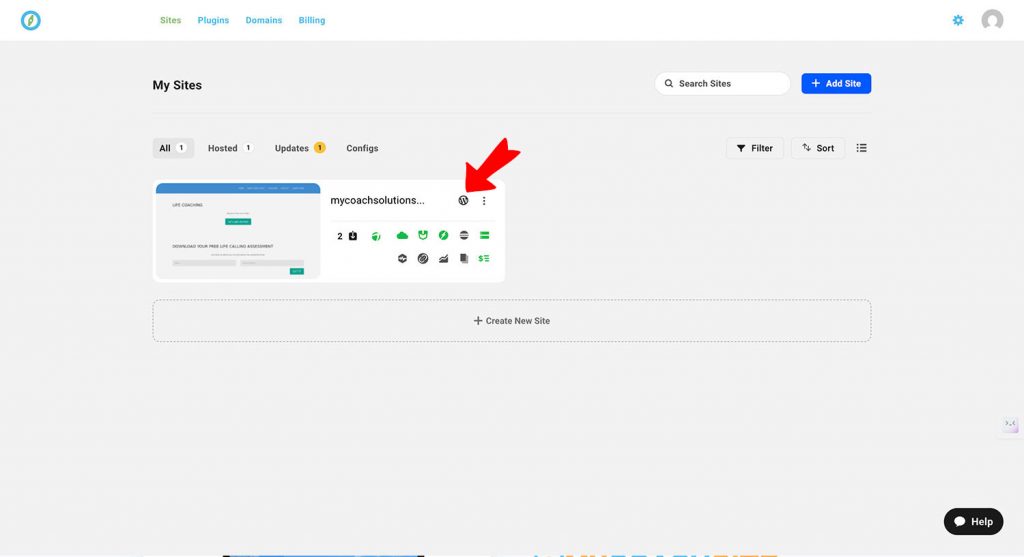
When you’re in your MyCoachSite account area, you’ll see a toolbar with several icons on it that represent the status of various areas of your website. The toolbar may look rectangular as you see in the picture, or it may be a long bar that goes all the way across the screen.
Click on the WordPress logo and you will be taken to your website’s admin login screen.
Step 4
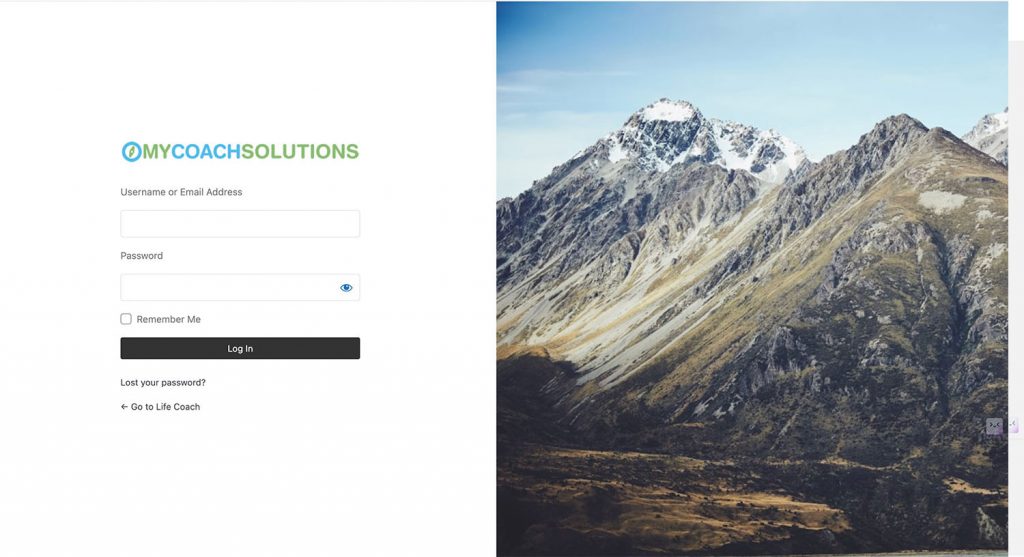
Log into the admin area of your website using the email and password you chose for your WordPress credentials when setting up your site.
You can bookmark this page if you want to skip the first three steps next time.
Step 5
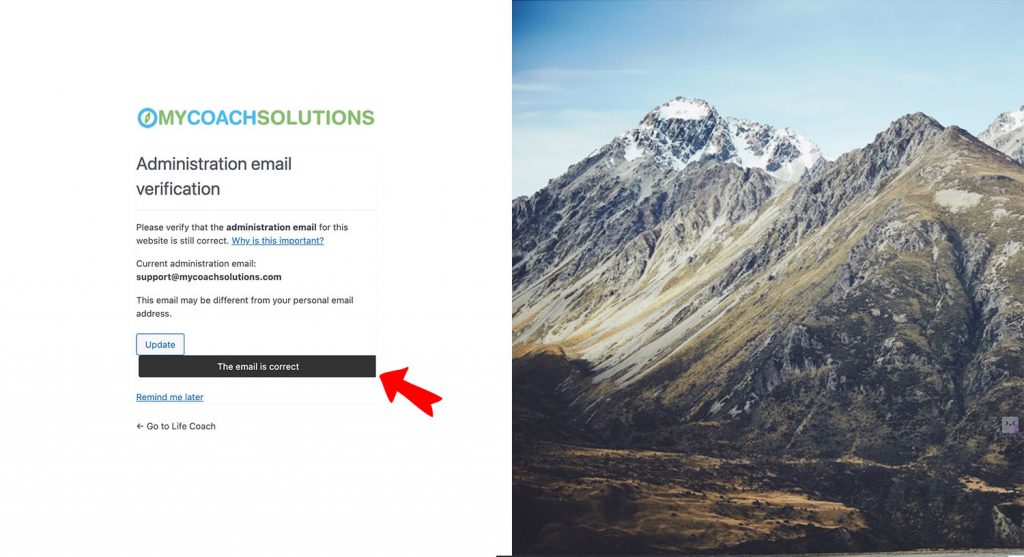
You might (or might not) see the following screen prompting you to verify the administration email address. It SHOULD say support@mycoachsolutions.com. Please do not change it. Instead, just click the button that says “The email is correct”.
Step 6
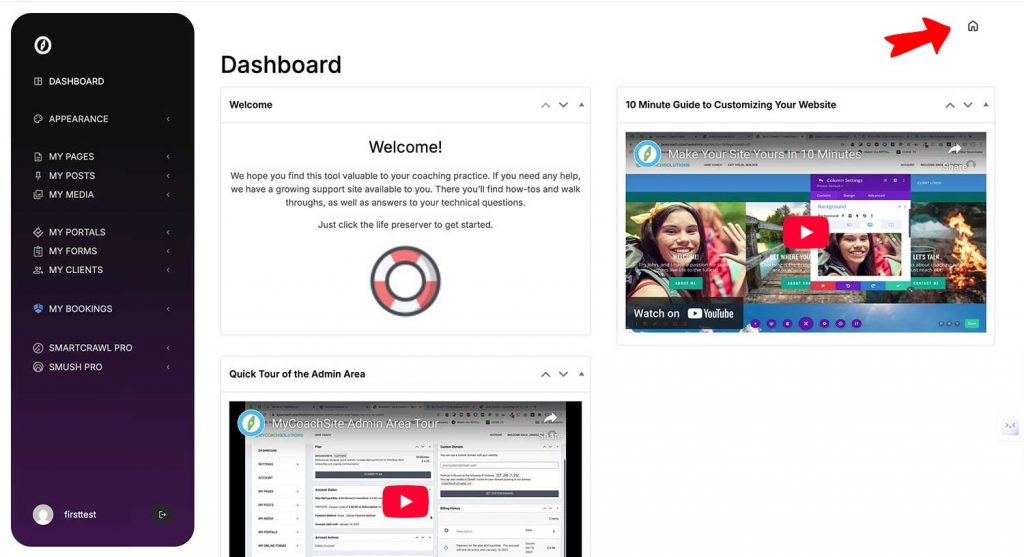
You’re now in your website’s admin area. From here, you can access the support website by clicking on the life preserver. There are also a couple of video tutorials here that will show you how to update your website.
To go to the public facing part of your website and access the visual builder to make changes, click on the house icon or the link that says “visit site”.
Important to note: Your admin area may look different from the one in the picture, but the functions are all the same. We are continually optimizing this area to offer the best experience possible.
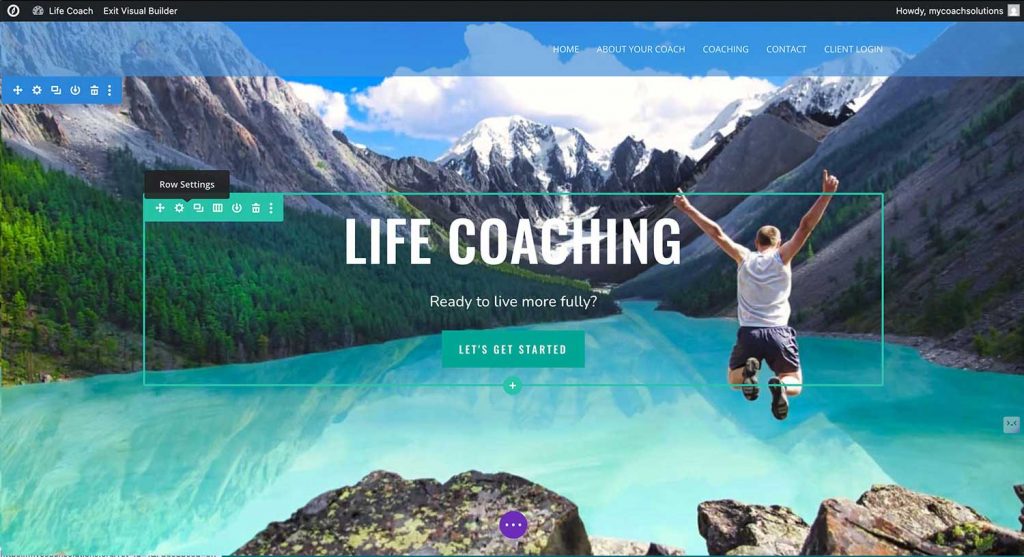
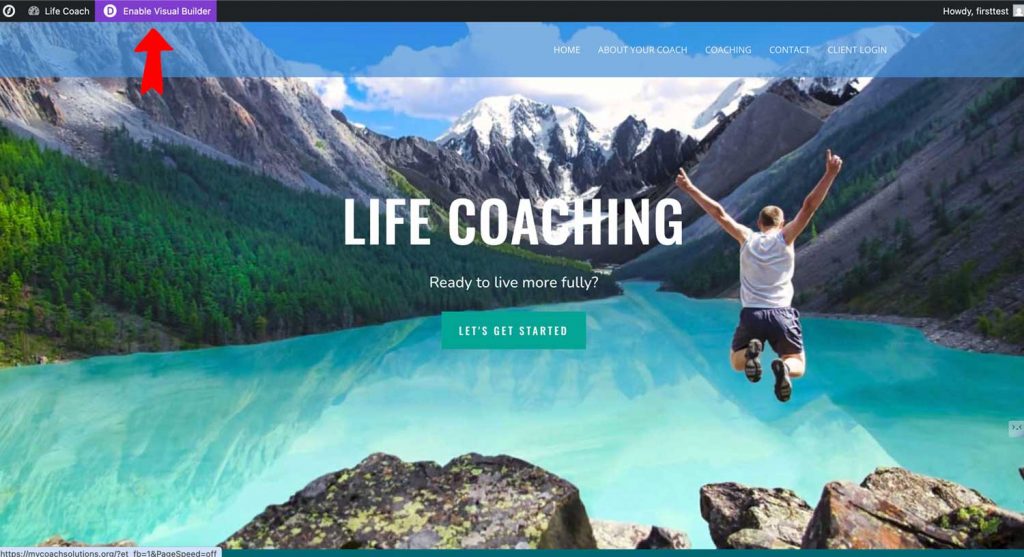
Step 7
You are now at your website’s home page and can see what it looks like to the public. Don’t worry about the black toolbar at the top though. Only you can see that because you’re logged in as an administrator.
Now that you’re here, you can activate the visual builder by clicking the purple button at the top of the screen.
Important to note: If the visual builder fails to load or displays an error message, please email support@mycoachsolutions.com.
Step 8
Once the visual builder is loaded, you will see tools appear when you hover over certain elements. Be sure to watch our getting started video for help on how to use the visual builder.
If you’re customizing your website for the first time, here is an article with some important tips.
If you would like to download a PDF to print out, just click here.